Yo, fam! Ready to embark on a dope journey into the realm of CO2 laser engraving? Buckle up ’cause we’re about to dive deep into the world of crafting awesomeness!
Listen up, squad, setting up your CO2 laser engraver is like the first step in leveling up your crafting game. It’s like the key to unlocking a whole new dimension of creativity and finesse. Whether you’re into DIY projects, making personalized gifts, or starting a small business, getting your CO2 laser engraver up and running is where the magic begins.
So, why is setting up your CO2 laser engraver so crucial, you ask? Well, picture this: it’s like laying the foundation for a sick skatepark. Without a solid setup, your tricks won’t land smoothly, and your flips will be flops. Similarly, without a properly set up CO2 laser engraver, your crafting endeavors might fall flat. But fear not, my friends, ’cause we’re here to guide you through every step of the way!
Get ready to unleash your inner artist and take your crafting skills to the next level. It’s time to fire up that CO2 laser engraver and let the creativity flow! 🚀🎨
Unboxing and Preparing Your CO2 Laser Engraver
Alright, fam, it’s time to get this party started! Before we dive headfirst into the world of CO2 laser engraving, we gotta make sure we’re geared up and ready to roll.
First things first, grab your tools and assemble the squad ’cause we’re unboxing that CO2 laser engraver like it’s Christmas morning! Get those scissors, box cutters, and whatever else you need to crack open that bad boy. Trust me, the excitement is real!
Here’s a concise checklist for setting up your CO2 laser engraver:
- Lay out all parts in a clear workspace.
- Follow step-by-step instructions provided by the manufacturer.
- Assemble the frame or base securely.
- Attach moving parts according to instructions.
- Install and secure the laser tube.
- Mount mirrors and lenses with proper alignment.
- Connect wiring as per the diagram.
- Double-check all connections and fasteners.
- Test movement of the engraving head.
- Power up and perform a functionality test.
But hold up, before we get too carried away with unboxing frenzy, let’s talk safety, my dudes. Safety always comes first, no ifs, ands, or buts about it. Fam, take a hot minute to familiarize yourself with all the safety precautions and equipment that come with your CO2 laser engraver. We’re talkin’ goggles, gloves, and maybe even a fire extinguisher, depending on how lit your setup is gonna be.
Once you’re all geared up and ready to rock, it’s time to unleash that CO2 laser engraver and let the engraving adventures begin! But remember, safety first, my peeps. Ain’t no project worth risking your health or safety over. Let’s keep it safe and keep the creativity flowing! 🚀🔥
Assembling Your CO2 Laser Engraver
Alright, squad, it’s time to get our hands dirty and put this CO2 laser engraver together like a boss! No time to waste, let’s dive right in and start piecing this bad boy together.
First off, grab those instruction manuals and lay ’em out like blueprints for a top-secret mission. We’re talkin’ step-by-step guides here, my dudes. Follow those instructions like your life depends on it, ’cause trust me, getting this assembly right is gonna set the tone for some epic engraving adventures ahead.
- Power Connection: Plug in the power cord.
- Computer Connection: Connect to your computer.
- Software Installation: Install engraving software.
- Driver Setup: Set up the engraver driver.
- Software Configuration: Adjust settings as needed.
- Material Preparation: Prepare engraving material.
- Test Engraving: Run a test engraving.
- Inspect Results: Check for any issues.
- Fine-Tuning: Adjust settings if necessary.
- Final Testing: Run additional tests for confirmation.
But yo, hold up! Before you start screwing things together like there’s no tomorrow, let’s talk about avoiding those rookie mistakes. We’re talkin’ about watching your step, my friends. One wrong move, and you could end up with a wonky setup that’s more trouble than it’s worth. So take your time, double-check those instructions, and steer clear of those common pitfalls and missteps.
With a steady hand and a sharp eye, we’ll have this CO2 laser engraver assembled in no time. So let’s get to it, fam, and let the engraving games begin! 🛠️🔥
Connecting and Testing Your CO2 Laser Engraver
Alright, my dudes and dudettes, it’s time to take our CO2 laser engraver to the next level and get this bad boy connected and fired up! No time to waste, let’s dive right into the action.
First things first, it’s plug ‘n play time! Grab those power cords and USB cables and get ready to connect your CO2 laser engraver to power and your computer. It’s like plugging in your gaming console before a marathon gaming sesh – gotta have that power flowin’!
Here’s a short and snappy checklist:
- Calibrate laser power.
- Set engraving speed.
- Adjust focal length.
- Configure resolution.
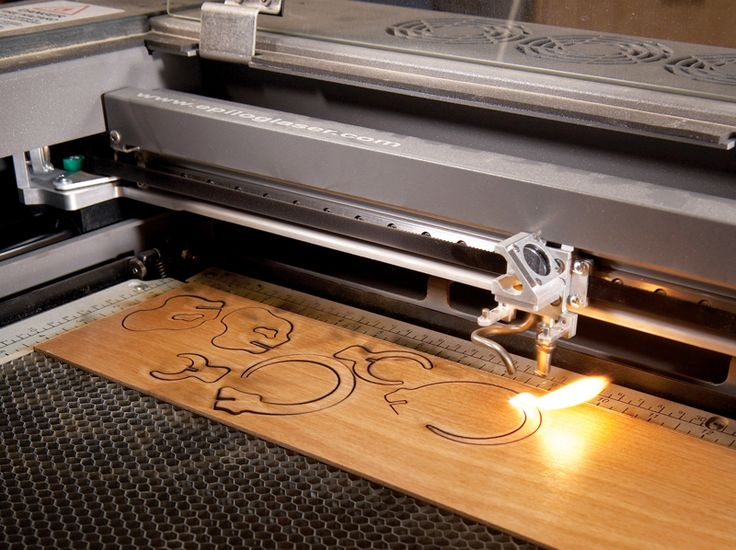
Once you’ve got everything hooked up and ready to rock, it’s time for the moment of truth – the test drive. Fire up that engraving software, load up your design, and let’s see what this baby can do! We’re talkin’ test engravings on scrap materials to make sure everything’s running as smooth as butter.
But hold up, my peeps, don’t rush into it like a bull in a china shop. Take your time, adjust those settings, and make sure every engraving is coming out clean and crispy. We’re aiming for precision here, not a hot mess of melted plastic.
With a successful test drive under your belt, you’ll be ready to tackle any engraving project that comes your way. So plug ‘n play, test drive, and let’s get this CO2 laser engraver party started! 🚀🔥
Calibrating and Adjusting Settings
Alright, listen up, fam, ’cause we’re about to dive into the nitty-gritty of fine-tuning your CO2 laser engraver like a pro. It’s time to dial it in and get this machine performing at its peak!
First up, we gotta talk about calibration – it’s like finding that perfect balance on a skateboard, you feel me? Learning how to calibrate your CO2 laser engraver is crucial for getting those crisp, clean engravings every time. We’re talking about adjusting the focus, speed, and power settings to hit that sweet spot of optimal performance. Trust me, once you’ve mastered calibration, you’ll be engraving like a boss.

- Learn engraving lingo.
- Master engraving software.
- Get creative with designs.
- Test engraving on various materials.
- Prioritize laser safety.
- Practice regularly to improve skills.
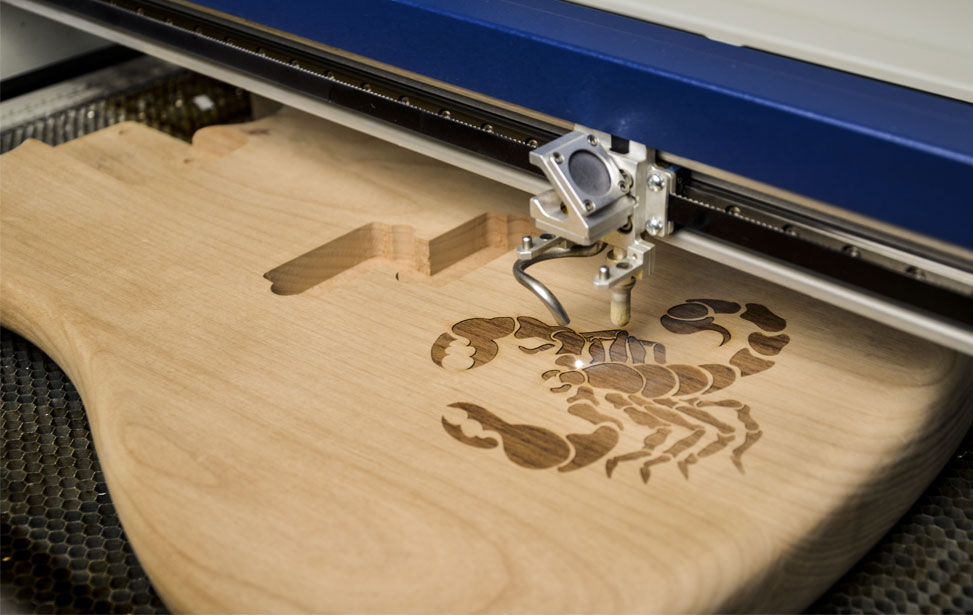
But hey, the fun doesn’t stop there! We’ve also gotta talk about tweaks ‘n tricks – it’s like unlocking secret levels in your favorite video game. Adjusting settings for different materials and engraving depths is where the real magic happens. Whether you’re working with wood, acrylic, or metal, knowing how to tweak those settings like a pro will take your engraving game to the next level. It’s all about finding that perfect balance between power and finesse, my friends.
So, grab your goggles, adjust your settings, and let’s dial in that CO2 laser engraver for some epic engraving adventures. With a little practice and some killer tweaks ‘n tricks up your sleeve, you’ll be engraving like a pro in no time! 🛠️🎨
Learning the Basics of CO2 Laser Engraving
Yo, yo, yo, it’s time to dive into the world of CO2 laser engraving and get our creative juices flowin’! We’re talkin’ about learning the basics, my peeps – it’s like layin’ down the foundation for some sick engraving adventures ahead.
Got it! Here’s a concise list:
- Learn the lingo: Understand terms like raster engraving, vector cutting, and DPI.
- Master the software: Familiarize yourself with engraving software like LightBurn or RDWorks.
- Get creative: Experiment with importing images, adding text, and creating shapes.
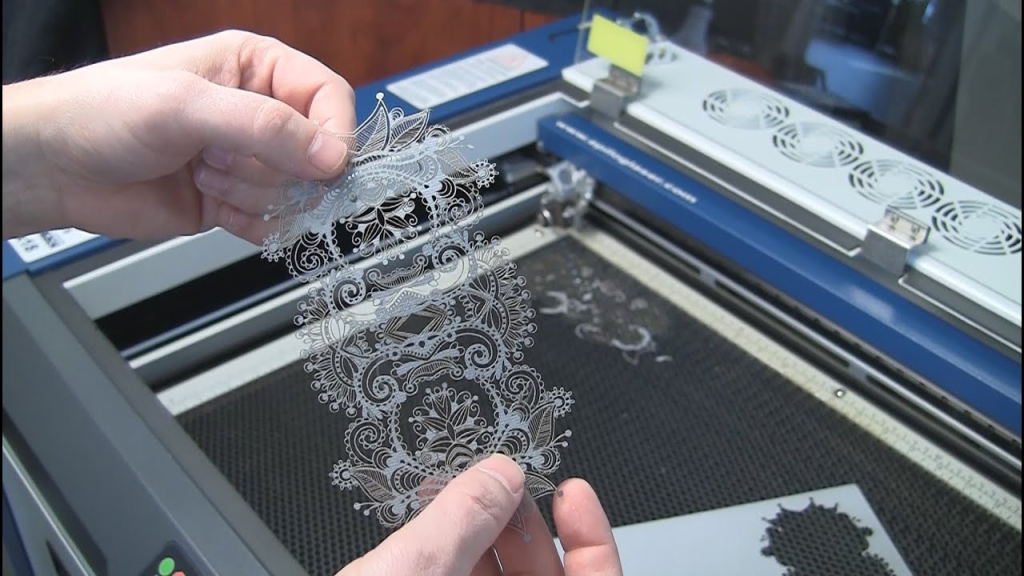
- Test materials: Try engraving on wood, acrylic, and leather to see how they react.
- Prioritize safety: Review laser safety guidelines before operating your engraver.
- Practice makes perfect: Start with simple projects and progress to more complex designs to improve your skills.
First up, let’s get artsy-fartsy and explore some basic techniques and design software for CO2 laser engraving. It’s like unlocking a whole new toolbox of artistic possibilities, ya feel? Whether you’re into creating custom designs, etching patterns, or engraving logos, there’s a whole world of creativity waiting for you to explore. So grab that design software, fire up your imagination, and let’s get craftin’!
But hey, ain’t nobody gonna become a master engraver overnight, right? That’s why practice makes perfect, my dudes. Start off with some simple projects to hone your skills and get the hang of that CO2 laser engraver. We’re talkin’ engraving on wood, acrylic, glass – you name it! The more you practice, the better you’ll get, and before you know it, you’ll be cranking out masterpiece after masterpiece like it’s nobody’s business.
So, get ready to unleash your inner artist and dive headfirst into the world of CO2 laser engraving. With a little creativity and a whole lotta practice, the sky’s the limit, my friends! 🚀🎨
Troubleshooting and Maintenance Tips
Alright, fam, listen up ’cause we’re about to tackle some real talk about troubleshooting and maintenance for your CO2 laser engraver. Ain’t nothin’ gonna stop us from keepin’ this machine runnin’ smooth like butter!
With these tips, you’ll be able to troubleshoot and maintain your CO2 laser engraver like a pro! 🛠️🔍
First off, let’s talk problem solvin’. We’ve all been there – you’re in the middle of an epic engraving session, and suddenly, somethin’ goes haywire. But fear not, my friends, ’cause we’re gonna tackle those common issues like a bunch of pros. Whether it’s dealing with misaligned mirrors, funky engraving results, or software glitches, we’ll troubleshoot ’em like bosses and get that CO2 laser engraver back on track in no time. Ain’t no problem too big for us to handle!
| # | Issue | Solution |
| 1 | Incomplete engraving | Check laser power and speed settings; adjust as needed for deeper cuts |
| 2 | Misalignment of engravings | Realign mirrors and lenses to ensure proper beam path |
| 3 | Excessive debris buildup | Clean mirrors, lenses, and engraving bed regularly to remove debris |
| 4 | Unusual noises or vibrations | Inspect moving parts for damage or wear; lubricate as necessary |
But hey, prevention is key, right? That’s where maintenance tips come into play. We’re talkin’ about keepin’ it fresh and keepin’ it clean, my dudes. Regular maintenance is gonna be your best friend when it comes to keepin’ your CO2 laser engraver runnin’ smooth like butter. From cleaning the lens and mirrors to checking for loose screws and belts, a little TLC goes a long way in extendin’ the life of your machine.
So there you have it, fam – troubleshootin’ and maintenance tips to keep your CO2 laser engraver in tip-top shape. With a little problem solvin’ and some regular maintenance, ain’t nothin’ gonna stand in the way of your engraving adventures. Let’s keep it smooth and keep those lasers burnin’ bright! 🔧🔥
Ready, Set, Engrave!
Alright, my fellow engraving enthusiasts, it’s time to wrap things up and get ready to unleash our creativity like never before! We’ve covered all the bases when it comes to setting up your CO2 laser engraver, so let’s do a quick recap before we dive headfirst into the engraving adventures ahead.
First off, we talked about unboxing and preparing your CO2 laser engraver – gatherin’ your tools, gettin’ familiar with safety precautions, and gettin’ ready to rock and roll. Then, we tackled the assembly process like a bunch of pros, piecin’ it all together and avoidin’ any common pitfalls along the way. Next up, we plugged ‘n played, connectin’ our machine to power and our computer, and runnin’ those test engravings to make sure everything’s runnin’ smooth.
And let’s not forget about calibratin’ and adjustin’ those settings – dialin’ it in for optimal performance and tweakin’ those settings for different materials and engraving depths like the pros we are. We even learned some basic techniques and software to get our creative juices flowin’ and started practicin’ on some simple projects to hone our skills.
So now that we’ve got our CO2 laser engraver all set up and ready to rock, it’s time to get crafty, my friends! Let’s dive in and let our creativity shine like never before. Whether you’re engravin’ custom designs, creatin’ personalized gifts, or startin’ your own engraving business, the sky’s the limit with your new engravin’ machine.
So go ahead, fam – grab that engraver, fire up your imagination, and let’s get engravin’! It’s time to turn our ideas into reality and make some magic happen. Ready, set, engrave! 🚀🔥